
There’s a magical, almost universal joy that happens when a platter of warm, decadent ham and cheese sliders hits the table. That moment of anticipation, the irresistible aroma of baking bread mingling with melted cheese and savory ham, followed by the perfect bite: soft, buttery, slightly crisp edges giving way to a gooey, flavorful center. It’s the ultimate crowd-pleaser, the potluck hero, the effortless game-day feed. But let’s be honest—not all slider recipes are created equal. Some are dry, others bland, and many lack that certain something that transforms simple ingredients into an unforgettable experience.
After years of testing, tasting, and perfecting, I can confidently say that your search for the definitive version ends here. This isn’t just another ham and cheese sandwich bake. This recipe is engineered for maximum flavor, perfect texture, and foolproof results. We’re going beyond the basics to create sliders that are irresistibly moist, richly flavorful, and have a signature “secret” element that will have everyone asking, “What did you put in these?” Whether you’re a seasoned home cook or a nervous newbie, this guide will walk you through every step, explain the why behind each ingredient, and empower you with tips and variations to make this recipe your own. Get ready to claim your title as the slider legend in your friend group and family.
Why This Recipe Works: The Science of the Perfect Slider
Before we dive into the ingredients, let’s talk about what separates an average slider from an extraordinary one. The common pitfall is dryness—a sad, chewy bun surrounding a meager filling. Our mission is to achieve textural harmony: a soft, pillowy interior, a lightly crisp top, and a bottom that soaks up just enough flavor without becoming soggy.
The magic lies in a trifecta of techniques:
- The Butter Baste: We don’t just brush butter on top. We create an infused, seasoned butter sauce that seeps into every crevice, basting the rolls as they bake. This keeps them incredibly moist and adds a deep, aromatic flavor layer.
- The Steam Pocket: By assembling the sliders tightly in a baking dish and covering them for the first part of baking, we trap steam. This gently reheats the fillings without expelling their moisture and ensures the bread stays soft.
- Flavor Layering: We build flavor from the bottom up—in the butter glaze, on the roll itself, within the cheese selection, and with the ham. Each component is considered for its contribution to the whole.
Understanding this “why” is your key to success, not just with this recipe, but with any baked sandwich creation.
The Secret Ingredient: Unveiling the “Wow” Factor
Many recipes stop at butter, mustard, and poppy seeds. We go further. The defining, can’t-put-your-finger-on-it flavor in these sliders comes from one humble ingredient: Worcestershire sauce. A few tablespoons mixed into the butter glaze introduces a complex umami depth—a savory, slightly sweet, and tangy note that beautifully complements the saltiness of the ham and the richness of the cheese. It’s the background singer that makes the lead vocals shine. It’s what people will taste but not immediately identify, leading to that coveted question, “What’s your secret?”
Gathering Your Ingredients: A Blueprint for Flavor
Using quality ingredients matters, even in a simple dish. Here’s your shopping list and the role each component plays.
For the Sliders:
- 1 package (12 count) Hawaiian Sweet Rolls: Do not separate the rolls. Keeping them connected as a sheet is crucial for easy assembly and clean cutting later. The inherent sweetness of these rolls is non-negotiable—it creates the perfect sweet-and-savory balance that makes these sliders iconic.
- 1 lb thinly sliced deli ham: I recommend a good-quality honey or black forest ham. Avoid ham that’s too thickly sliced, as it can make the sliders difficult to bite into.
- 12 slices Swiss cheese: Swiss melts beautifully and has a mild, nutty flavor that doesn’t overpower. Provolone is an excellent alternative if you prefer a slightly sharper taste.
For the Legendary Butter Glaze:
- 1/2 cup (1 stick) unsalted butter: The foundation of our moisture and flavor.
- 2 tablespoons Worcestershire sauce: The secret weapon, as discussed.
- 1 tablespoon yellow mustard: Adds tang and helps emulsify the glaze.
- 1 tablespoon finely minced onion (or 1 tsp onion powder): Provides a sweet, aromatic base flavor.
- 2 teaspoons poppy seeds: For that classic, slightly nutty texture and visual appeal.
- 1 teaspoon garlic powder: For essential savory depth.
- 1/2 teaspoon sea salt: Enhances all the other flavors.
- 1/4 teaspoon black pepper: A hint of warmth.
Smart Ingredient Substitutions
Don’t have something? No problem. Here’s your guide to adaptations:
- Rolls: No Hawaiian rolls? Any soft, connected slider buns or even soft dinner rolls will work. The flavor profile will change, but the technique remains the same.
- Cheese: Swiss can be swapped for provolone, Gruyère (for a more sophisticated taste), gouda, or even a sharp cheddar for a bolder kick. For a super-creamy result, mix in a few slices of American cheese.
- Ham: Turkey, roast beef, or even sliced smoked chicken are fantastic alternatives. For a holiday twist, use leftover sliced turkey or glazed ham.
- Dairy-Free/Gluten-Free: Use your favorite plant-based butter and cheese slices. Gluten-free slider buns are now widely available—just ensure they’re connected. Tamari can replace Worcestershire sauce (check for gluten-free if needed, as Worcestershire often contains barley).
- Mustard: Yellow mustard can be replaced with Dijon for a more nuanced spice, or even a grainy mustard for added texture.
Step-by-Step Preparation: Your Roadmap to Perfection
Follow these instructions for flawless results every single time.
Step 1: Prepping the Canvas
Preheat your oven to 350°F (175°C). Without separating the rolls, slice the entire sheet of Hawaiian rolls in half horizontally, like you’re cutting a giant bun. Place the bottom half directly into a 9×13 inch baking dish (or on a parchment-lined baking sheet for crispier edges).
Step 2: Building the Flavor Layers
Layer the ham evenly over the bottom half of the rolls, folding the slices to create some height and texture. Follow with the Swiss cheese slices, ensuring good coverage to the edges so every bite is cheesy.
Step 3: The Signature Glaze
While the oven preheats, make the butter glaze. In a small saucepan over medium-low heat, melt the butter. Once melted, remove from heat and whisk in the Worcestershire sauce, yellow mustard, minced onion, poppy seeds, garlic powder, salt, and pepper. Whisk until fully combined and fragrant.
Step 4: The First Flavor Soak
This is a critical tip for ideal texture: Using a pastry brush or spoon, carefully drizzle and brush about one-third of the butter glaze over the bottom layer of rolls (the one with the ham and cheese). This pre-soak ensures the foundation is flavorful and moist from the very first bite.
Step 5: Assembling & The Second Soak
Place the top half of the rolls on the filled bottom half. Generously brush the remaining butter glaze over the top and sides of the rolls, letting it pool slightly in the crevices. Make sure every surface is coated.
Step 6: Baking to Golden Perfection
Cover the baking dish tightly with aluminum foil. Bake covered for 15 minutes. This steams the sliders, melting the cheese perfectly and warming everything through without drying out.
After 15 minutes, remove the foil. Continue baking, uncovered, for another 8-12 minutes, or until the tops are a beautiful, golden brown and the cheese is visibly bubbly around the edges.
Step 7: The Final Rest & Serve
Remove from the oven and let the sliders rest for 5 minutes. This allows the cheese to set slightly, making them much easier to cut and preventing scorching burns. Using a sharp serrated knife, slice along the pre-scored lines to separate into 12 individual sliders. Serve warm.
Chef’s Notes: Pro Tips for Next-Level Results
- For Ultimate Softness: If your rolls seem a tad dry, you can wrap the entire assembled-but-unbaked dish in plastic wrap and let it sit in the fridge for up to 4 hours. This allows the butter glaze to slowly absorb into the bread.
- For a Caramelized Crunch: Sprinkle a tablespoon of grated Parmesan cheese over the butter glaze just before the final uncovered bake.
- Make-Ahead Mastery: Assemble the sliders completely (including the butter glaze) up to a day in advance. Cover tightly and refrigerate. Add 5-7 minutes to the covered baking time when baking from cold.
- Reheating for Leftovers: Reheat leftovers in the oven at 325°F or in an air fryer for a few minutes to restore the crisp top. The microwave will make them soggy.
Endless Variations: Make It Your Own
This recipe is a masterpiece on its own, but it’s also the perfect canvas for creativity. Here are some beloved variations to try:
The “Everything” Slider: Add a layer of creamy ranch dressing or everything bagel seasoning to the butter glaze. Use turkey and cheddar.
The Pizza Slider: Swap ham for pepperoni, use mozzarella and provolone cheese, and add a few tablespoons of pizza sauce or marinara to the butter glaze. Garnish with dried oregano.
The Thanksgiving Leftover Slider: Use sliced turkey, a layer of creamy cranberry sauce, and brie or cheddar cheese. Add a pinch of dried thyme to the butter glaze.
The Cuban-Inspired Slider: Use sliced pork (or ham), Swiss cheese, and add a layer of thinly sliced dill pickles and a smear of yellow mustard inside before baking.
The Breakfast Slider: Use cooked sausage patties or bacon, scrambled eggs, and cheddar cheese. Consider adding a dash of maple syrup to the butter glaze.
The Final Result & Serving Suggestions
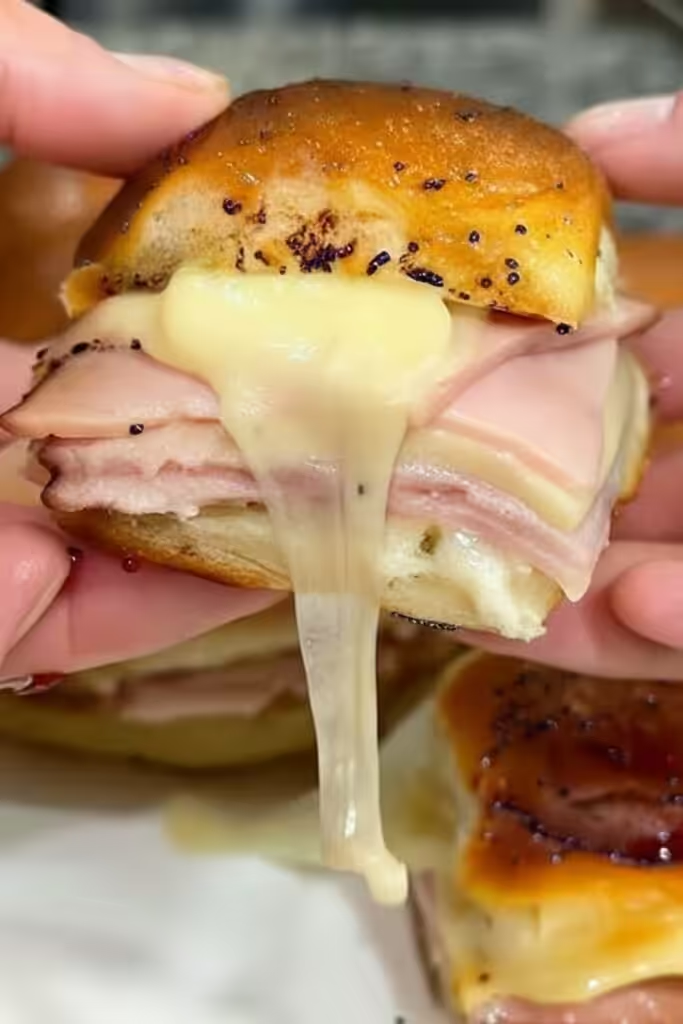
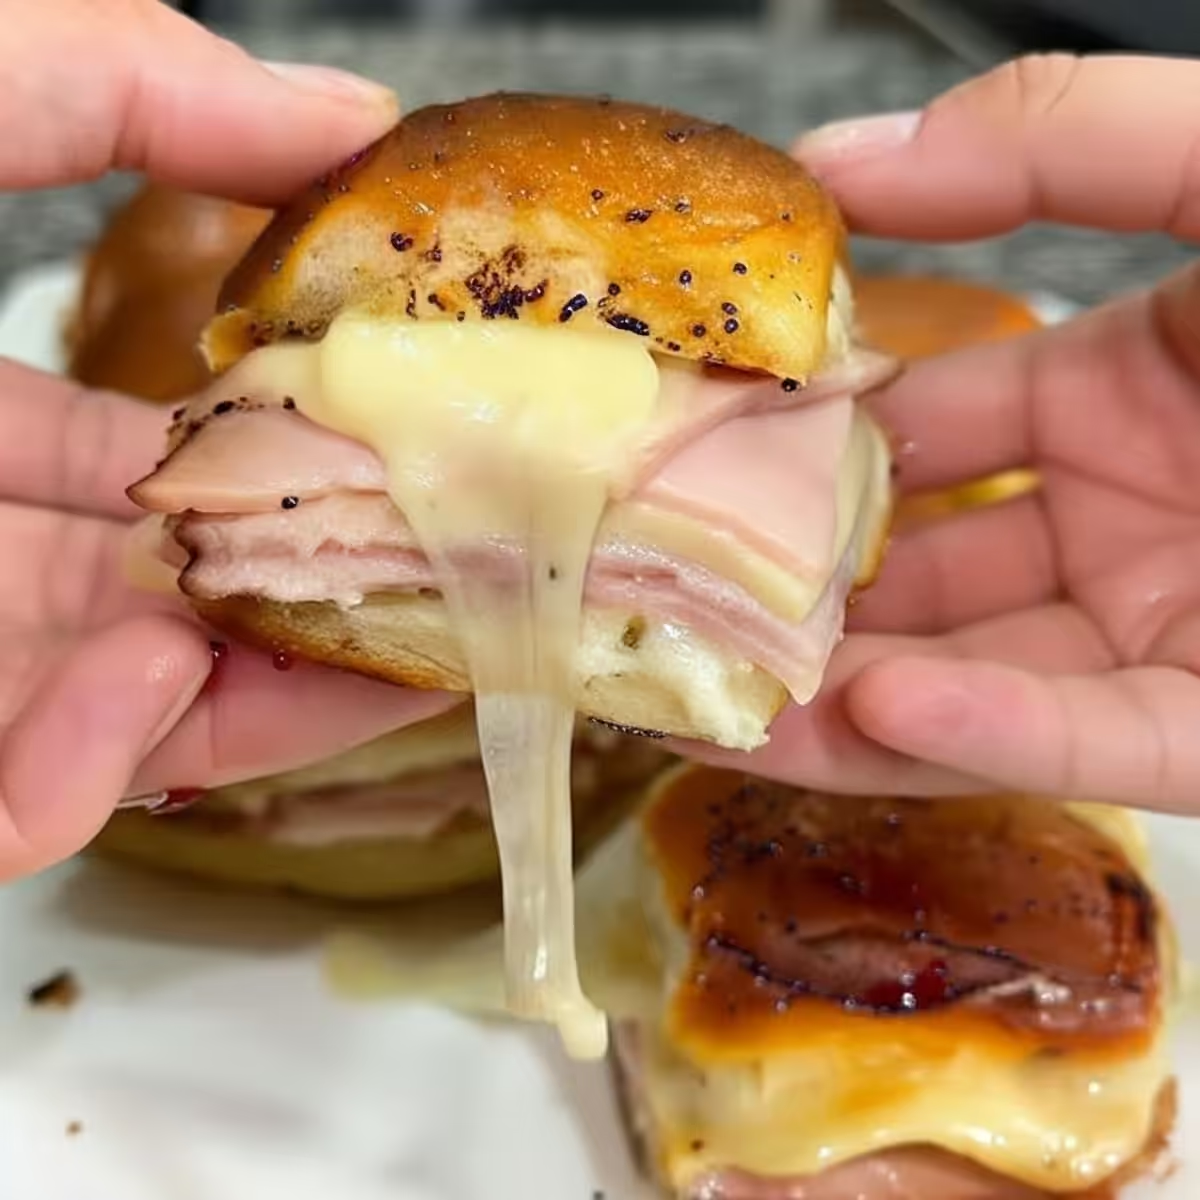
What you’ll pull from the oven is a masterpiece of casual entertaining: a golden, fragrant, cohesive sheet of sliders where every element has married into perfection. The bread will be impossibly soft yet structured, with a buttery, slightly tangy crust. The cheese will be luxuriously melted, binding the savory ham in every gooey bite.
These sliders are incredibly versatile. Serve them as:
- The main attraction for game day, paired with a platter of crispy oven fries and carrot sticks.
- A comforting weeknight dinner with a simple green salad or a bowl of tomato soup.
- The star of your next potluck or picnic—they travel beautifully.
- A brilliant brunch offering alongside fresh fruit and mimosas.
I hope this recipe becomes a trusted favorite in your home, a dish you turn to when you need to feed a crowd with minimal fuss and maximum praise. The detailed instructions, tips, and variations are here to give you the confidence to not just follow a recipe, but to understand it. That’s when real cooking joy begins.
Did you make this recipe? I’d love to hear how it turned out for you! Leave a comment below with your experience, any clever twists you added, or questions you might have. Your feedback helps me create even better content for you. And if you found this guide helpful, please share it with a friend who needs the world’s best ham and cheese slider recipe in their life.
Happy baking, and enjoy every delicious, buttery bite

Ham & Cheese Sliders
Ingredients
Equipment
Method
- Preheat your oven to 350°F (175°C) and grease a 9×13 inch baking dish.
- Slice the entire pack of rolls in half horizontally to create a top and bottom slab. Place the bottom half in the prepared dish.
- Layer the ham and then the Swiss cheese evenly over the bottom slab of rolls. Place the top slab of rolls over the cheese.
- In a small bowl, whisk together melted butter, Dijon mustard, Worcestershire sauce, poppy seeds, and onion powder. Pour evenly over the rolls.
- Cover with foil and bake for 10-15 minutes. Remove foil and bake for another 5 minutes until the tops are golden and cheese is melted.