
The sizzle of a hot griddle, the unmistakable aroma of seared beef and onions, the oozy cascade of melted cheese—it’s the sensory promise of a perfect Philly Cheesesteak. But what if you could capture that iconic, soul-satisfying experience without the need for a professional flat-top or paper-thin shaved ribeye? Enter the Ground Beef Philly Cheesesteak Sandwich: a brilliant, accessible, and deeply delicious reimagining of the classic that delivers on every textural and flavorful promise, right from your own kitchen skillet.
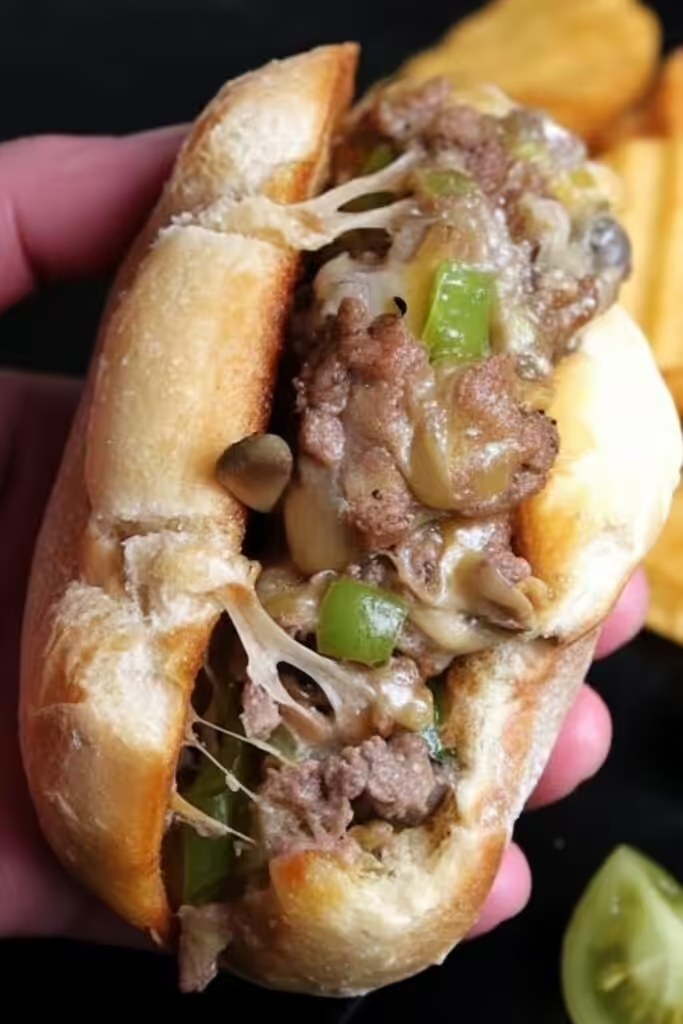
As a culinary strategist who has explored countless iterations of American comfort food, I can attest that the soul of a great cheesesteak lies not in a single, hard-to-source cut of meat, but in the harmony of its components: the savory, well-seasoned beef, the sweet, caramelized onions and peppers, the rich, melting cheese, and the soft yet sturdy roll that holds it all together. This ground beef version is not a compromise; it’s a strategic triumph. It leverages the convenience and consistent texture of ground beef to create a filling that is uniformly flavorful, incredibly juicy, and clings to every nook of the bread. It’s the answer for weeknight cravings, game-day feasts, and any moment that demands maximum satisfaction with minimal fuss. Forget the long lines and the debate over Cheese Whiz; this is your blueprint for a perfect, homestyle cheesesteak experience.
Why This Ground Beef Cheesesteak Recipe Is a Game-Changer
The genius of this adaptation lies in understanding and replicating the core culinary principles of the original, using smart techniques to achieve a similar, crowd-pleasing result.
Mastering the Maillard Reaction with Ground Beef. A traditional cheesesteak gets its deep, savory flavor from the rapid, high-heat searing of thinly sliced steak, a process known as the Maillard reaction. With ground beef, we achieve this differently but just as effectively. The key is to avoid stewing or steaming the meat. We cook it in a hot, preferably cast-iron or heavy-bottomed skillet, in a single layer if possible, letting it develop a hearty, brown crust before breaking it apart. This browning creates complex, umami-rich flavor compounds that form the foundation of our filling. We then use the rendered beef fat to cook our vegetables, infusing them with that rich, meaty essence.
The Vegetable Trinity: Building Sweetness and Texture. Onions, and often green peppers, are non-negotiable. Cooking them slowly until they truly soften and caramelize is the secret weapon. This isn’t just about making them tender; it’s about transforming their natural sugars into a sweet, jammy, deeply flavorful counterpoint to the savory beef. The slight char on the edges of the peppers adds a welcome smokiness. This step cannot be rushed—the patience here pays off in every bite.
The Cheese Melt: A Study in Adhesion. The choice of cheese is pivotal, but the method of application is equally important. While classic options like provolone or Cheese Whiz have their merits, we often use a combination of melty white American cheese and a sharp provolone for the ideal balance of creaminess and flavor. The technique? Adding shredded cheese directly to the hot beef and vegetable mixture in the pan and folding it in gently. This allows the cheese to melt evenly and coat every morsel, creating a cohesive, luscious filling that won’t slide out of the sandwich. It’s a messy, beautiful, and essential step.
The Anatomy of a Perfect Sandwich: Ingredients & Substitutions
This recipe thrives on simplicity and quality. Here’s your essential guide to the ingredients and how to adapt them to any diet or pantry.
The Core Construction:
- For the Savory Filling:
- 1.5 lbs Ground Beef (80/20 blend): The higher fat content is crucial for flavor and juiciness. Leaner blends can result in a drier filling.
- 1 Large Yellow Onion, thinly sliced: Yellow onions offer the perfect balance of sharpness and sweetness for caramelizing.
- 1-2 Green Bell Peppers, thinly sliced: The classic choice. For a sweeter note, use red or orange bell peppers.
- Seasoning Arsenal: Kosher salt, black pepper, garlic powder, and a touch of paprika or onion powder. Worcestershire sauce is a secret umami booster.
- For the Cheese Sauce & Melt:
- 8 oz White American Cheese, shredded: This is the “glue” for its superior melt. Deli-sliced American works too.
- 4 oz Provolone Cheese, shredded: Adds a sharper, more complex cheesy note.
- Optional Boost: A splash of beef broth or milk to adjust consistency.
- For the Vessel:
- 4-6 Hoagie or Sub Rolls: The bread must be soft enough to bite through easily but sturdy enough to hold the filling without disintegrating. A lightly toasted, buttered roll is ideal.
Ingredient Substitutions & Variations:
For the Protein:
- Ground Turkey or Chicken: A leaner option. Add 1-2 tablespoons of olive oil or butter to the pan when cooking to compensate for less fat, and be generous with seasoning.
- Plant-Based “Ground” Crumbles: An excellent vegan base. Use a brand that browns well, and cook according to package directions, using vegetable oil.
- The Traditional Route: If you want to use steak, thinly slice 1.5 lbs of ribeye or skirt steak (partially freeze for easier slicing). Sear over very high heat for just 60-90 seconds before proceeding.
For the Cheese (The Melting Matrix):
- Classic Cheese Whiz: For ultimate authenticity, simply warm a jar of Cheese Whiz and spoon it over the assembled sandwiches.
- Cheese Sauce: Create a simple sauce by melting 2 tbsp butter, whisking in 2 tbsp flour to make a roux, then slowly whisking in 1.5 cups of milk until thickened. Off heat, stir in 8 oz of shredded cheese until smooth.
- Dairy-Free: Use a high-quality vegan cheese shreds blend designed to melt. A homemade cheese sauce using nutritional yeast, soaked cashews, and plant-based milk can also work beautifully.
For the Bread & Fillings:
- Gluten-Free: Use your favorite sturdy gluten-free sub rolls or baguettes.
- Mushroom & Swiss: Add 8 oz of sliced cremini mushrooms with the peppers. Swap the cheese for Swiss or Gruyère.
- “Pizza Steak” Variation: Stir a few tablespoons of marinara sauce into the beef mixture and top with shredded mozzarella and pepperoni before toasting.
- Spicy “Cheesesteak Hoagie”: Add sliced jalapeños or banana peppers with the onions. Use pepper jack cheese.
Crafting the Perfect Sandwich: A Step-by-Step Guide
Follow this detailed method for a flawless, restaurant-quality result that comes together in one pan.
Preparation: The Foundation of Flavor
- Slice Your Vegetables Uniformly: Thin, even slices of onion and pepper will cook at the same rate and caramelize properly. Take your time here.
- Shred Your Own Cheese: Pre-shredded cheese contains anti-caking agents that can inhibit a smooth melt. Block cheese shredded at home will deliver a far superior, creamier texture.
- Prepare the Rolls: Split your hoagie rolls lengthwise, but do not cut all the way through—leave a “hinge.” If desired, lightly butter the interior and toast them under a broiler or in a skillet until just golden. This creates a protective barrier against sogginess.
Cooking Method: Building Layers in the Skillet
- Caramelize the Vegetables (Medium Heat): In your large skillet or cast-iron pan, heat 1-2 tablespoons of oil or butter over medium heat. Add the sliced onions and peppers. Cook, stirring occasionally, for 12-15 minutes until they are very soft, sweet, and have developed golden-brown spots. Season with a pinch of salt. Transfer to a bowl and set aside.
- Brown the Beef to Perfection (Medium-High Heat): Increase the heat. Add the ground beef to the same skillet, breaking it apart. Let it sit undisturbed for 2-3 minutes to develop a good sear on one side before stirring. Continue to cook until fully browned and no pink remains, about 7-10 minutes. During the last minute, season generously with salt, pepper, garlic powder, and a good dash of Worcestershire sauce.
- The Grand Unification & Cheese Melt: Return the caramelized vegetables to the skillet with the beef. Reduce heat to low. Mix thoroughly. Evenly sprinkle all of the shredded cheese over the entire surface of the beef and vegetable mixture. Cover the skillet with a lid or a large baking sheet for 1-2 minutes, just until the cheese is fully melted.
- The Final Fold: Uncover and, using a sturdy spatula, gently fold the cheese into the beef and vegetables until everything is evenly coated in a glorious, cheesy blanket. If the mixture seems too thick, add a splash of beef broth or milk to loosen it.
Pro Tip for Ultimate Flavor: After removing the vegetables, consider deglazing the hot pan with a tablespoon of water or beef broth, scraping up any browned bits (fond). Let it evaporate, then add a touch of fresh oil before adding the beef. This incorporates those concentrated flavors directly into the meat.
Assembly & The Final Toast: Engineering the Perfect Bite
Assembly is not an afterthought; it’s the final act of construction that ensures structural integrity and optimal flavor in every bite.
- Fill Generously, But Wisely: Using a spatula, pile the cheesy beef mixture into the waiting, toasted hoagie rolls. Press down lightly to help it settle.
- The Optional “Griddle Press” (Highly Recommended): For an authentic deli experience, wrap each assembled sandwich tightly in aluminum foil. Place the wrapped sandwiches back in the skillet over medium-low heat. Place a heavy pan or bacon press on top and let them “toast” for 3-4 minutes per side. This step melts the cheese further, marries the flavors, and compresses the sandwich for the perfect, mess-minimized bite.
- Serve Immediately: Unwrap, slice in half if desired, and serve hot. Have napkins ready—this is a joyfully messy affair.
Serving Suggestions & Classic Pairings
This sandwich is a hearty meal on its own, but the right sides complete the experience.
- The Classic Duo: Crispy French fries, steak fries, or potato wedges are the quintessential pairing. For a homemade touch, try baked sweet potato fries.
- For a Lighter Touch: A tangy vinegar-based coleslaw or a simple dill pickle spear cuts through the richness perfectly.
- The Philly Staple: Soft pretzels with spicy mustard make for a fantastic, thematic side.
- Beverage Pairing: A cold lager or pilsner, a robust IPA, or a classic cherry soda (like Cheerwine or a Coke) complements the savory flavors brilliantly.
Storing, Reheating, & FAQs
Storage: Store any leftover filling (separate from the rolls) in an airtight container in the refrigerator for up to 3-4 days.
Reheating for Best Results: Reheat the filling gently in a skillet over medium-low heat, adding a tiny splash of water or broth to refresh the moisture. Do not microwave assembled sandwiches, as the bread will become impossibly soggy. For a revived sandwich, reheat the filling separately and assemble into a freshly toasted roll.
Freezing: The cooked, cooled beef and vegetable filling (without cheese) freezes well for up to 3 months. Thaw overnight in the refrigerator, reheat in a skillet, and add fresh cheese when serving.
Frequently Asked Questions
Can I make these Ground Beef Philly Cheesesteaks ahead of time?
Yes, you can prepare the filling (through step 3, before adding cheese) 1-2 days in advance. Store it covered in the fridge. When ready to serve, reheat the filling, stir in the cheese until melted, and assemble your sandwiches. This makes for an incredibly quick weeknight meal.
What’s the best way to prevent a soggy sandwich?
The double-toast method is key: 1) Toast the interior of the roll before filling, creating a barrier. 2) After assembling, give the wrapped sandwich a final toasting/press in a skillet or panini press. This seals the deal.
My cheese didn’t melt smoothly. What happened?
You likely used pre-shredded cheese or had the heat too high. Shred your own cheese from a block and add it to the mixture off the direct heat, covering the pan to let the residual heat melt it gently. Stir only after it’s fully melted.
Your Homemade Cheesesteak Victory Awaits
This Ground Beef Philly Cheesesteak Sandwich recipe is more than just a clever hack; it’s a celebration of accessible, crowd-pleasing flavor. It proves that with a little culinary know-how, you can recreate the essence of a beloved restaurant classic in your own kitchen, on your own terms. The combination of savory, cheesy, and sweet, all bundled into a soft, toasted roll, is a universal language of comfort.
So, grab your skillet and your appetite. Embrace the sizzle, the melt, and the beautiful mess. In the time it would take to decide on delivery, you can be sitting down to a hot, homemade cheesesteak that’s tailored exactly to your taste.
Did you make this recipe? I’d love to see your creation! What cheese combination did you choose? Did you add any special toppings? Share your experience, your photos, or any questions in the comments below. Your feedback helps build our community of home cooks. And if this sandwich became a new family favorite, please consider sharing this article with a fellow comfort food enthusiast.
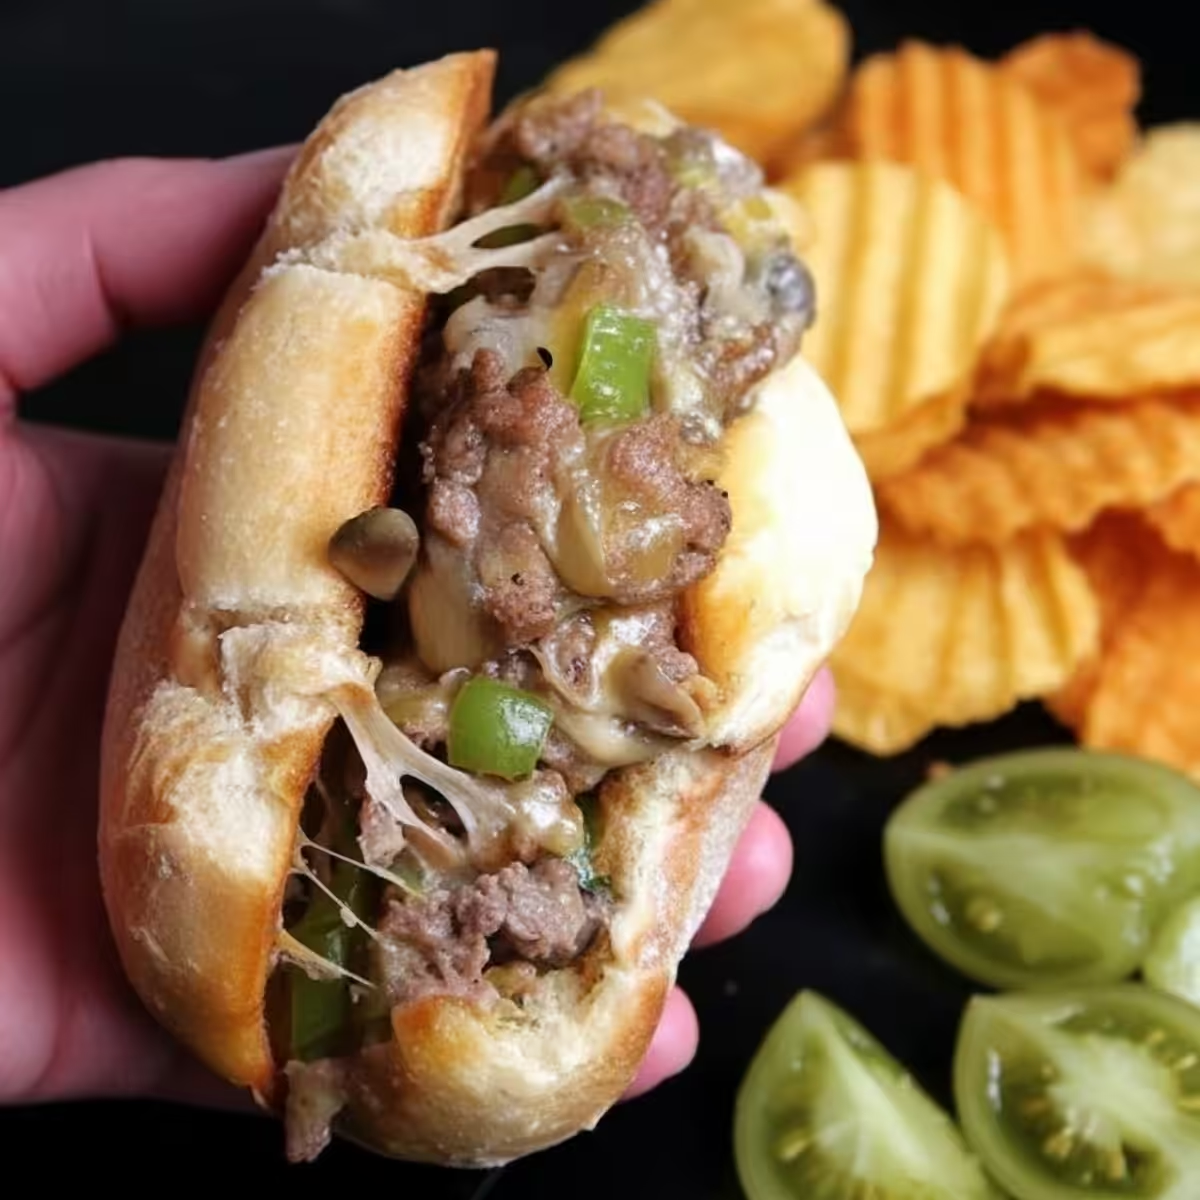

Easy Ground Beef Philly Cheesesteak Sandwiches
Ingredients
Equipment
Method
- Heat the butter or oil in a large skillet over medium-high heat. Add the sliced onions and bell peppers. Sauté for 5-7 minutes until they are soft and slightly caramelized. Remove from the skillet and set aside.
- In the same skillet, add the ground beef. Cook, breaking it up with a spatula, until browned and no pink remains. Drain any excess grease.
- Stir the cooked peppers, onions, and minced garlic back into the skillet with the beef. Add the Worcestershire sauce, salt, and pepper. Toss well to combine and cook for 1-2 minutes until fragrant.
- Divide the meat mixture into 4 equal piles in the skillet. Place 2 slices of provolone cheese over each pile. Cover the skillet with a lid for 30-60 seconds until the cheese is completely melted.
- Toast the hoagie rolls if desired. Use a wide spatula to scoop up each cheesy beef portion and slide it into a roll. Serve hot.