
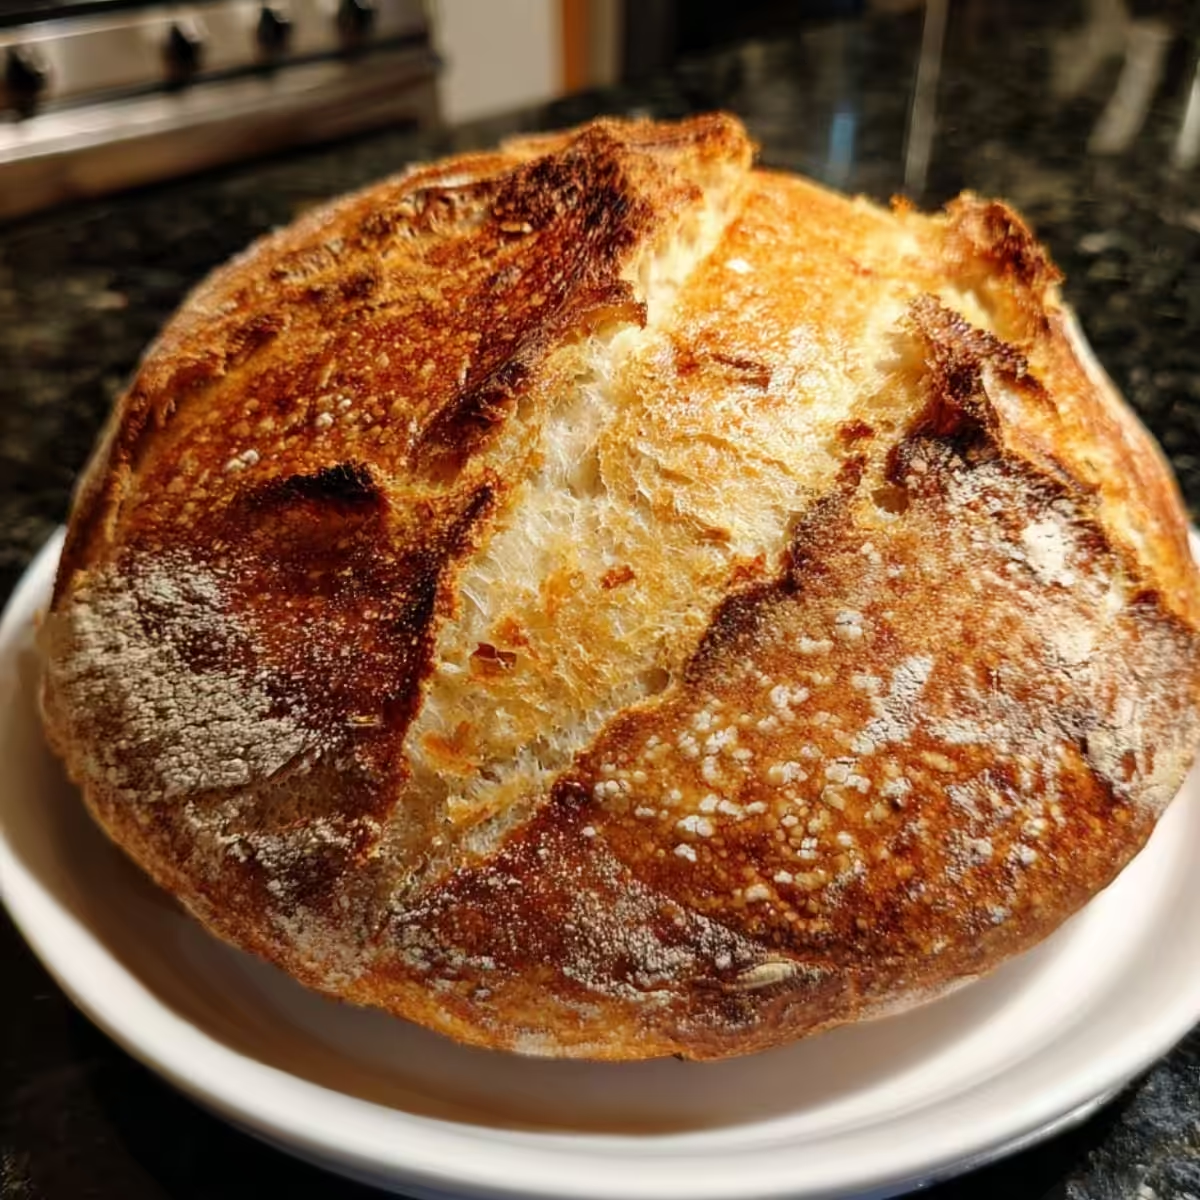
There’s something magical about pulling a loaf of sourdough bread from your oven—the deep golden crust that crackles under your knife, the airy crumb that pulls apart into glossy strands, and that unmistakable tangy aroma that fills your kitchen. This is the best crusty sourdough bread recipe for beginners because it delivers bakery-quality results without complicated techniques or special equipment you don’t already own.
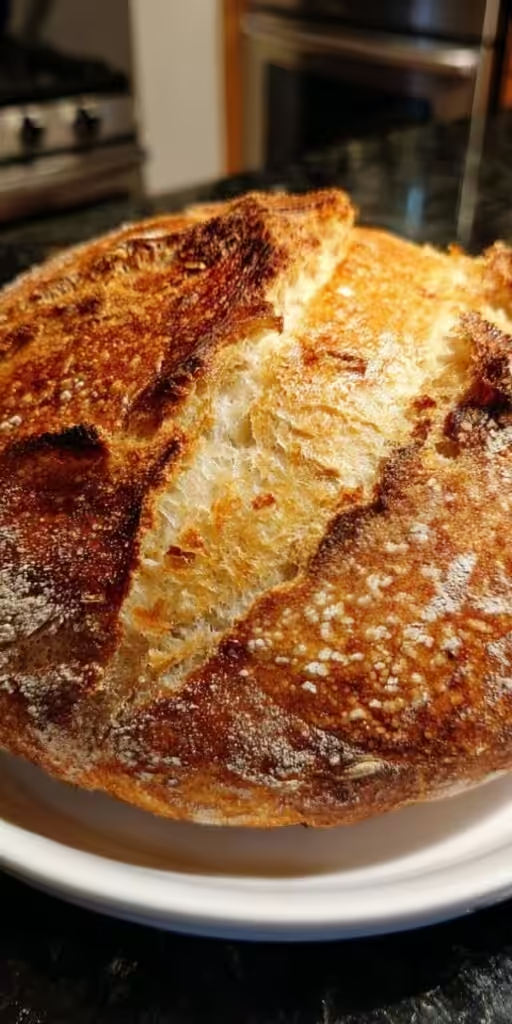
In just a few hands-on minutes spread over 18 hours (most of it hands-off while the dough works its magic), you’ll create a loaf with shatteringly crisp texture on the outside and a soft, chewy interior full of complex flavor. No commercial yeast, no fancy gadgets—just four simple, naturally fermented ingredients and clear, step-by-step guidance that builds your confidence from the very first stretch-and-fold.
Whether you’re baking your very first loaf or looking to perfect that signature open crumb and blistered crust, this recipe is designed for success. The high-hydration dough and Dutch-oven steam create the dramatic oven spring and crackly crust beginners dream about. Let’s walk through everything you need to know so your first sourdough loaf turns out crusty, flavorful, and utterly satisfying.
Why This Sourdough Recipe Works So Well for Beginners
Sourdough baking can feel intimidating, but the science is surprisingly forgiving. Wild yeast and beneficial bacteria in your starter slowly ferment the dough, producing carbon dioxide for natural rise and lactic acid for that signature tang. This long fermentation also breaks down gluten slightly, making the bread easier to digest and giving it deeper flavor than quick-rise breads.
The key to crusty texture lies in three simple factors: high hydration (around 71%), proper gluten development through gentle stretch-and-folds, and steam during the first 20 minutes of baking. Steam keeps the surface soft so the dough can expand fully before the crust sets—resulting in that dramatic oven spring and blistered exterior every home baker wants.
This recipe keeps active time under 30 minutes while delivering professional results. It’s flexible with kitchen temperatures, forgiving for first-timers, and endlessly customizable. Once you master this method, you’ll have the foundation for every sourdough creation you dream up.
Ingredients for Perfect Crusty Texture and Flavor
This recipe uses only four everyday ingredients, but each plays a crucial role in achieving that ideal crusty exterior and tender crumb:
- 100 grams active sourdough starter (fed and bubbly, doubled in size within 4–6 hours)
Your starter is the heart of the recipe. It provides leavening, flavor, and natural acidity that tenderizes the crumb while strengthening the crust. - 350 grams bread flour (or all-purpose flour in a pinch)
Bread flour’s higher protein content (11–13%) creates strong gluten networks that trap gas for an open, airy crumb and support the tall rise needed for crusty structure. - 250 grams filtered water (room temperature, about 70–75°F / 21–24°C)
Filtered water avoids chlorine that can slow fermentation. This hydration level gives the signature open crumb without making the dough too sticky for beginners. - 10 grams sea salt (or kosher salt)
Salt controls fermentation speed, strengthens gluten, and brings out the bright, tangy flavor that makes sourdough addictive.
These quantities produce one beautiful 800-gram loaf—perfect for a family or for freezing half to enjoy later.
Equipment You’ll Need (Most Kitchens Already Have It)
You don’t need expensive tools. Here’s exactly what works:
- Digital kitchen scale (for precise measurements—volume measurements can vary by 20%)
- Large mixing bowl
- Bench scraper or spatula
- Banneton proofing basket (or a bowl lined with a clean tea towel)
- Dutch oven with lid (cast iron or enamel, 5–7 quart)
- Sharp lame, razor blade, or very sharp knife for scoring
- Wire cooling rack
The Dutch oven is the secret weapon for crusty sourdough—it traps steam and mimics a professional steam-injected oven.
Step-by-Step Instructions: Your Foolproof Path to Crusty Sourdough
Step 1: Mix the base (5 minutes)
In a large bowl, combine the 250 grams water and 100 grams active starter. Stir until the starter dissolves completely. Add the 350 grams bread flour and mix with a spoon or your hand until no dry flour remains and the dough looks shaggy. Cover and let rest 30 minutes. This autolyse step allows the flour to fully hydrate and begins gluten development without effort.
Step 2: Add the salt (2 minutes)
Sprinkle the 10 grams salt evenly over the rested dough. Wet your hands and pinch the salt into the dough, folding it over itself until fully incorporated. The dough will feel firmer now.
Step 3: Stretch and folds (10 minutes total, spread over 2 hours)
Every 30 minutes for the next 2 hours, perform 4–6 stretch-and-folds: wet your hands, reach under the dough, pull up gently, and fold over the center. Rotate the bowl and repeat. This gentle technique builds strength without a stand mixer and creates the open crumb structure beginners love.
Step 4: Bulk fermentation (4–8 hours)
Cover the bowl and let the dough rise at room temperature (ideally 70–75°F / 21–24°C) until it has doubled in size, feels airy, and shows bubbles on the sides. Timing varies with your kitchen temperature—cooler kitchens take longer, warmer ones go faster. This is where the magic tangy flavor develops.
Step 5: Pre-shape the dough (3 minutes)
Turn the dough onto a lightly floured surface. Gently fold the edges toward the center to form a loose ball. Flip seam-side down and let rest 15–20 minutes. This relaxes the gluten for easier final shaping.
Step 6: Final shaping (3 minutes)
Using your bench scraper, flip the dough seam-side up. Fold the top third down, bottom third up, then roll into a tight log (for a batard) or tuck edges underneath (for a boule). Place seam-side up in your floured banneton.
Step 7: Cold proof (8–12 hours overnight)
Cover the banneton and place in the refrigerator. The cold slows fermentation while the dough continues to develop flavor and structure—perfect for fresh-baked bread in the morning.
Step 8: Preheat and score (35 minutes)
Place your Dutch oven in the oven and preheat to 450°F (230°C) for 30 minutes. Remove the cold dough from the fridge, turn it out onto parchment, score a deep slash (or decorative pattern) with your lame. The score allows controlled expansion for maximum oven spring and that signature crusty split.
Step 9: Bake for crusty perfection (45 minutes)
Carefully lower the dough (still on parchment) into the hot Dutch oven. Cover and bake 20 minutes—this creates steam for the crusty exterior. Remove the lid and bake another 25 minutes until the loaf is deep golden brown and sounds hollow when tapped on the bottom (internal temperature 205–210°F / 96–99°C).
Step 10: Cool properly (2 hours)
Transfer to a wire rack and let cool completely before slicing. Cutting into warm bread compresses the crumb and ruins the texture.
Pro Tips for Achieving Ideal Crusty Texture Every Time
- Temperature matters: Aim for 70–75°F dough temperature. Use a thermometer if your kitchen runs hot or cold.
- Hydration control: If your dough feels too sticky, add 10–15 grams flour during stretch-and-folds. Wetter dough = more open crumb and better crust.
- Steam is everything: The covered Dutch oven creates the perfect microclimate for oven spring and blistered crust.
- Scoring technique: A confident, ½-inch deep cut at a 45° angle gives dramatic rise and beautiful ear formation.
- Starter strength: Test your starter by dropping a spoonful in water—if it floats, it’s ready and will give the tallest, crustiest loaf.
Delicious Recipe Variations to Try Next
Once you master the base recipe, these easy variations keep things exciting while maintaining the signature crusty texture:
Whole Grain Crusty Sourdough
Replace 50 grams of bread flour with whole wheat or rye flour. The nutty flavor pairs beautifully with the tang and still delivers an open crumb.
Seeded Crusty Loaf
After shaping, brush the top lightly with water and roll in a mix of sesame, poppy, and flax seeds. The seeds create an extra-crunchy crust that looks bakery-worthy.
Chocolate Sourdough Bread
Reduce bread flour to 300 grams and add 50 grams unsweetened cocoa powder plus 100 grams dark chocolate chips. The result is a rich, crusty loaf perfect for breakfast toast—still naturally fermented and beginner-friendly.
Herb and Olive Crusty Version
Fold in 100 grams chopped olives and 2 teaspoons dried rosemary or thyme during the last stretch-and-fold. The Mediterranean flavors shine against the crisp crust.
All variations follow the same timing and technique—just adjust add-ins at the right moment to preserve gluten strength.
Smart Ingredient Substitutions
- No bread flour? Use all-purpose flour + 1 tablespoon vital wheat gluten per 350 grams flour.
- No sea salt? Kosher salt works at the same weight (table salt is too fine—use 8 grams instead).
- Want lower hydration for easier handling? Reduce water to 220 grams for a slightly tighter crumb while keeping the crust crisp.
- Dairy-free and vegan by nature—no changes needed.
Common Beginner Mistakes and How to Fix Them
- Dense crumb: Usually from under-fermentation or weak starter. Extend bulk fermentation next time and ensure your starter passes the float test.
- Pale crust: Oven temperature too low or lid removed too early. Always preheat fully and bake uncovered long enough for deep browning.
- Flat loaf: Over-proofed or scored too shallow. Stick to the cold-proof method and make a bold score.
- Gummy texture: Bread cut while still warm. Always cool on a rack for at least 2 hours.
How to Store and Enjoy Your Homemade Crusty Sourdough
Fresh sourdough stays crusty for 2–3 days at room temperature wrapped in a clean tea towel or paper bag. For longer storage, slice and freeze in airtight bags—toast straight from frozen for that fresh-baked crunch.
The best way to enjoy it? Thick slices toasted with butter, dipped in olive oil and balsamic, or turned into the ultimate grilled cheese. Leftovers make incredible croutons, French toast, or bread pudding.
Ready to Bake Your First Crusty Loaf?
You now have everything you need to create bakery-level crusty sourdough bread at home—even as a complete beginner. The process is forgiving, the results are stunning, and the satisfaction of that first slice is unmatched.
Bake this recipe, then come back and tell us in the comments: How did your crust turn out? Did you try a variation? Rate the recipe below, share your photos, and tag us so we can celebrate your success.
For more beginner-friendly bread adventures, explore our easy no-knead focaccia guide, rustic baguette recipe, or complete sourdough starter maintenance tutorial. Your kitchen is about to smell incredible—happy baking!

The Best Crusty Sourdough Bread Recipe for Beginners
Ingredients
Equipment
Method
- In a large bowl, combine the filtered water and active sourdough starter. Stir until the starter is fully dissolved. Add the bread flour and mix until no dry flour remains and the dough looks shaggy. Cover and rest 30 minutes (autolyse).
- Sprinkle the salt evenly over the dough. Wet your hands and pinch the salt into the dough, folding until fully incorporated.
- Every 30 minutes for the next 2 hours, perform 4-6 stretch-and-folds: wet your hands, pull the dough up gently, and fold over the center. Rotate the bowl each time.
- Cover the bowl and let the dough rise at room temperature (70-75°F) until doubled in size and bubbly, about 4-8 hours depending on your kitchen temperature.
- Turn the dough onto a lightly floured surface. Gently fold the edges to the center to form a loose ball. Flip seam-side down and rest 15-20 minutes.
- Flip the dough seam-side up. Fold the top third down, bottom third up, then roll or tuck into a tight boule or batard shape. Place seam-side up in a floured banneton.
- Cover and place the banneton in the refrigerator for 8-12 hours overnight.
- Place your Dutch oven inside the oven and preheat to 450°F for 30 minutes. Turn the cold dough out onto parchment paper and score a deep slash with a sharp lame.
- Carefully lower the dough into the hot Dutch oven. Cover and bake 20 minutes. Remove the lid and bake another 25 minutes until deep golden and hollow-sounding when tapped.
- Transfer the loaf to a wire cooling rack and cool completely for at least 2 hours before slicing.