
There is a unique and undeniable charm to a dessert that is both exquisitely delicious and irresistibly cute. Heart-Shaped Red Velvet Cake Pops perfectly capture this duality, offering the classic, beloved flavor of red velvet—a hint of cocoa, a touch of tanginess—in a delightful, handheld, and endlessly customizable form. More than just cake on a stick, a well-made cake pop is a textural marvel: a dense, moist, and fudgy interior enveloped in a crisp, sweet shell of coating, creating a satisfying bite that delights all ages. Whether you’re planning for Valentine’s Day, an anniversary, a bridal shower, or simply want to express love in edible form, mastering these treats is a rewarding endeavor.
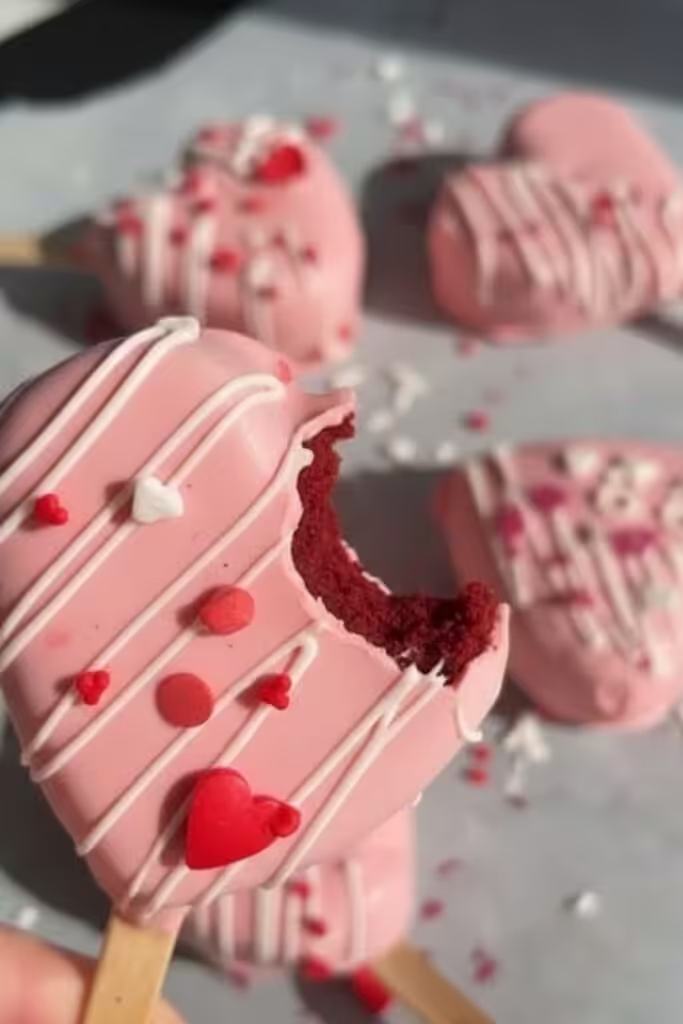
As a professional recipe developer, I can tell you that the process is wonderfully approachable. With the right techniques and a bit of patience, you can create stunning, professional-looking cake pops that are sure to be the highlight of any celebration. This guide is designed to be your ultimate resource, walking you through every step with clarity and confidence, ensuring your baking project is a resounding success.
Why This Recipe Works: The Science of the Perfect Cake Pop
Understanding the “why” behind the process is the key to avoiding common pitfalls and achieving consistently perfect results. A cake pop is not merely crumbled cake; it’s a carefully balanced reconstruction.
The Foundation: Cake Crumbs and Binder. We start with a baked red velvet cake, cooled and crumbled into fine, even crumbs. This provides the signature flavor. The “secret” to the ideal dense, fudgy texture lies in the binder. While many recipes use canned frosting, this can often lead to an overly sweet, greasy final product. Our recipe uses a carefully measured combination of cream cheese frosting and a touch of heavy cream. The cream cheese complements the red velvet’s tang, adds richness without being cloying, and binds the crumbs into a pliable, moldable “dough” that holds its shape without being wet or heavy.
The Structural Engineering: Shaping and Chilling. The binding step is what allows us to transform crumbs into hearts. The preparation tip of chilling the mixture before shaping is non-negotiable. It firms up the fats, making the dough less sticky and far easier to work with. When shaping the hearts, compacting the mixture firmly is crucial; any air pockets can cause the pop to crack or fall off the stick later. The second chill, after the pops are on sticks, is arguably the most critical step for structural integrity. It solidifies the pop completely, preventing it from dissolving into the warm coating when dipped.
The Magic Shell: Coating and Setting. The choice of coating—whether candy melts, chocolate, or a confectionery glaze—creates the signature shell. Tempering or properly thinning your coating is essential for a smooth, even, drip-free application. The science is simple: a completely cold cake pop meets a fluid, warm coating. The temperature difference causes the coating to set almost immediately, sealing in the moisture and creating that satisfying snap when bitten. Dipping technique, which we will cover in detail, is the final skill to master for a flawless, professional finish.
Essential Equipment for Cake Pop Success
Having the right tools on hand streamlines the process and significantly improves your results.
- Baking Tools: 9×13 inch cake pan, mixing bowls, electric mixer.
- Cake Pop Specifics: 48-ounce Styrofoam block or cake pop stand (for drying), lollipop sticks (4-inch or 6-inch), disposable piping bags or deep, narrow cups for dipping.
- For Shaping: Heart-shaped cookie cutter (approximately 1.5 inches wide) OR a small heart-shaped candy mold for ultimate uniformity.
- For Decoration: Sprinkles, edible pearls, sanding sugar, and extra coating for drizzling.
The Master Recipe: Heart-Shaped Red Velvet Cake Pops
This recipe yields approximately 30-35 beautiful, full-sized heart cake pops.
Ingredients
For the Red Velvet Cake:
- 1 box (approx. 15.25 oz) red velvet cake mix, plus ingredients listed on box (typically water, oil, and eggs)
- or ½ batch of your favorite homemade red velvet cake, baked in a 9×13 pan
For the Cream Cheese Binder:
- 4 ounces (113g) full-fat cream cheese, softened to room temperature
- 3 tablespoons (42g) unsalted butter, softened
- 1 cup (120g) confectioners’ sugar, sifted
- ½ teaspoon pure vanilla extract
- 1-2 tablespoons heavy cream or whole milk
For Coating & Assembly:
- 32 ounces (about 4 cups) red candy melts or chocolate wafers (high-quality brands like Ghirardelli or Merckens work best)
- 2-3 teaspoons refined coconut oil or paramount crystals (for thinning)
- Lollipop sticks
- Optional: White candy melts or pink coating for decorative drizzles.
Step-by-Step Instructions
Phase 1: Bake and Crumble
- Bake the Cake: Prepare and bake the red velvet cake mix according to package directions for a 9×13 inch pan. Allow it to cool completely in the pan on a wire rack. For best texture and flavor, you can bake the cake a day ahead.
- Create Fine Crumbs: Once the cake is completely cool, break it into chunks and place it in a large mixing bowl. Using your fingertips, a fork, or a stand mixer with the paddle attachment on low, crumble the cake into uniformly fine crumbs. No large pieces should remain. This is a key preparation tip for a smooth dough.
Phase 2: Create the Cake Pop Dough
- Make the Binder: In a medium bowl, beat the softened cream cheese and butter together until completely smooth and creamy. Add the sifted confectioners’ sugar and vanilla extract. Beat on low until incorporated, then on medium until smooth. Add 1 tablespoon of heavy cream and beat. The frosting should be thick but spreadable. Add the second tablespoon only if needed to achieve a creamy consistency.
- Bind the Crumbs: Pour the cream cheese binder over the cake crumbs. Using a rubber spatula or your hands (wearing food-safe gloves is ideal), mix and fold until the mixture is uniformly moist and holds together when pinched. It should resemble a soft, moldable dough. If it seems too dry and won’t hold a shape, add a teaspoon more cream. If it feels excessively sticky or greasy, you can add a tablespoon of extra cake crumbs (reserve a small handful for this purpose).
- First Chill: Cover the bowl tightly with plastic wrap and refrigerate for at least 1 hour, or up to overnight. This chilling step is crucial for easy shaping.
Phase 3: Shape the Hearts
- Method A (Using a Cutter): Line a baking sheet with parchment paper. Scoop out about 1.5 tablespoons of the chilled dough and roll it into a smooth ball. Place the ball on the parchment and gently flatten it into a thick disc, about ¾-inch thick. Press your heart-shaped cookie cutter firmly into the disc to cut out the shape. Gently push the heart out of the cutter and onto the sheet. Re-roll scraps. This method creates charming, hand-formed hearts.
- Method B (Using a Mold): For perfect, uniform hearts every time, use a plastic heart-shaped candy mold. Press the chilled dough firmly into each cavity, ensuring it is packed tightly with no air gaps. Scrape off the excess with a bench scraper. Place the mold in the freezer for 15 minutes, then flex the mold to pop out the perfectly shaped hearts. This is the most efficient technique for shaping.
- Second Chill: Place the shaped hearts on the parchment-lined tray. Freeze for 15 minutes, then transfer to the refrigerator while you prepare the coating. They should be very cold but not frozen solid for dipping.
Phase 4: Dip, Decorate, and Set
- Prepare the Coating: In a deep, microwave-safe bowl or a disposable piping bag, melt the red candy melts with 2 teaspoons of coconut oil. Heat in 30-second bursts at 50% power, stirring thoroughly between each burst, until completely smooth and fluid. The consistency should be like warm pancake batter. If it’s too thick, add more coconut oil in ¼ teaspoon increments. Never use water or butter to thin candy melts. Pour some of the coating into a tall, narrow glass for easier dipping.
- Assemble the Pops: Take a few hearts out of the fridge at a time. Dip the tip of a lollipop stick about ½ inch into the melted coating, then immediately insert it straight into the bottom of a heart, pushing no more than halfway through. This “glue” of coating helps secure the stick. Return the pop to the tray and repeat. Let this initial set for 5 minutes.
- The Dipping Technique: Holding the stick, dip a cake pop straight down into the coating until it is completely submerged. Slowly lift it out, and gently tap your wrist while rotating the pop to allow any excess coating to drip off. This is the most important step to avoid a heavy, lumpy bottom. Do not stir the pop in the coating.
- Decorating & Drying: Before the coating sets, you can roll the pop in sprinkles or add other decorations. Then, stick the pop upright into your Styrofoam block to set completely. If adding drizzles, wait until the red coat is fully set, then use melted white coating in a piping bag with a tiny tip or a zip-top bag with a corner snipped off.
- Final Set: Allow all cake pops to set at cool room temperature for at least an hour. For the shiniest finish and firmest shell, they can be set in the refrigerator for 15 minutes after the coating is dry to the touch.
Pro Tips for Flawless Cake Pops
- Temperature is King: Cold cake pops + fluid (not hot) coating = success. If your coating is too hot, it will crack the shell as it sets. Let it cool slightly before dipping.
- Avoid Cracking: The main causes of cracked shells are: 1) A frozen-solid cake pop causing the coating to set too quickly, 2) A cake pop that is too warm, and 3) Moving the stick after the coating has begun to set. Work with refrigerator-cold pops.
- Smooth Coating Fix: If your first dip leaves a lumpy texture, allow it to set completely, then give it a second, very quick dip in freshly melted, fluid coating.
- Storage: Store finished cake pops in a single layer in an airtight container at cool room temperature for up to 5 days, or in the refrigerator for up to 2 weeks. They can be frozen for up to 2 months; thaw in the refrigerator overnight.
Creative Variations & Dietary Substitutions
The framework of this recipe is wonderfully adaptable. Here are several recipe variations to inspire you.
1. Chocolate-Dipped Variation:
Use a classic red velvet cake base, but dip the formed hearts into pure, tempered dark chocolate or high-quality milk chocolate wafers. The contrast of the red interior against a dark chocolate shell is elegant and delicious.
2. Vegan & Dairy-Free Adaptation:
- Cake: Use a vegan red velvet cake mix or recipe (using non-alcoholic vinegar and plant-based milk/eggs).
- Binder: Substitute vegan cream cheese and plant-based butter. Use powdered sugar that is confirmed vegan (no bone char).
- Coating: Use dairy-free dark chocolate or vegan candy melts.
3. Gluten-Free Version:
Use a certified gluten-free red velvet cake mix or your favorite gluten-free red velvet recipe. Ensure all other ingredients (like sprinkles) are certified GF. The binding process remains exactly the same.
4. Nut-Free Assurance:
This recipe is naturally nut-free. Always double-check labels on cake mix, candy coatings, and sprinkles for “may contain” warnings if you have severe allergies.
5. Flavor Twists:
- Orange Velvet: Use a white cake mix, add orange extract and orange zest to the binder, and color with orange gel. Dip in white chocolate.
- Funfetti Hearts: Use a vanilla or funfetti cake mix. Add rainbow sprinkles to the dough and coat with vanilla candy melts.
Troubleshooting Common Cake Pop Challenges
- Cake pops are too soft/crumbly: The binder ratio is off. Add more frosting/binder, ½ tablespoon at a time, until the dough holds. Ensure you chilled before shaping.
- Cake pops fall off the stick: The initial “glue” step was skipped, the pop was not cold enough when dipped, or the stick was inserted into an air pocket. Also, ensure you’re not moving the stick while the coating sets.
- Coating is too thick and clumpy: Thin it with more refined coconut oil or paramount crystals. Ensure you are not overheating the coating, which can cause it to seize.
- Shell has bubbles or blemishes: The coating may have been stirred too vigorously, incorporating air. Tap the bowl gently to release bubbles before dipping.
- Finished pops are sweating: This happens when condensation forms on cold pops in a humid environment. Store them in a cool, dry place, not a sealed container while still cold from the fridge.
Presentation & Serving Ideas
Present your Heart-Shaped Red Velvet Cake Pops nestled in a bed of decorative shred, standing proudly in a decorated Styrofoam block covered with ribbon, or arranged beautifully in clear cellophane bags tied with a ribbon as heartfelt gifts. They are the perfect sweet treat for a Valentine’s Day party favor, a romantic dessert platter, or a charming addition to a baby shower or birthday celebration. For a full thematic experience, pair them with other red velvet delights like my Fudgy Red Velvet Crinkle Cookies or a slice of classic Red Velvet Layer Cake.
Your Celebration Awaits
Creating these Heart-Shaped Red Velvet Cake Pops is a labor of love that yields incredible rewards—not just in the form of adorable treats, but in the joy of the creative process itself. With this comprehensive guide, you have all the knowledge needed to troubleshoot, adapt, and execute with confidence.
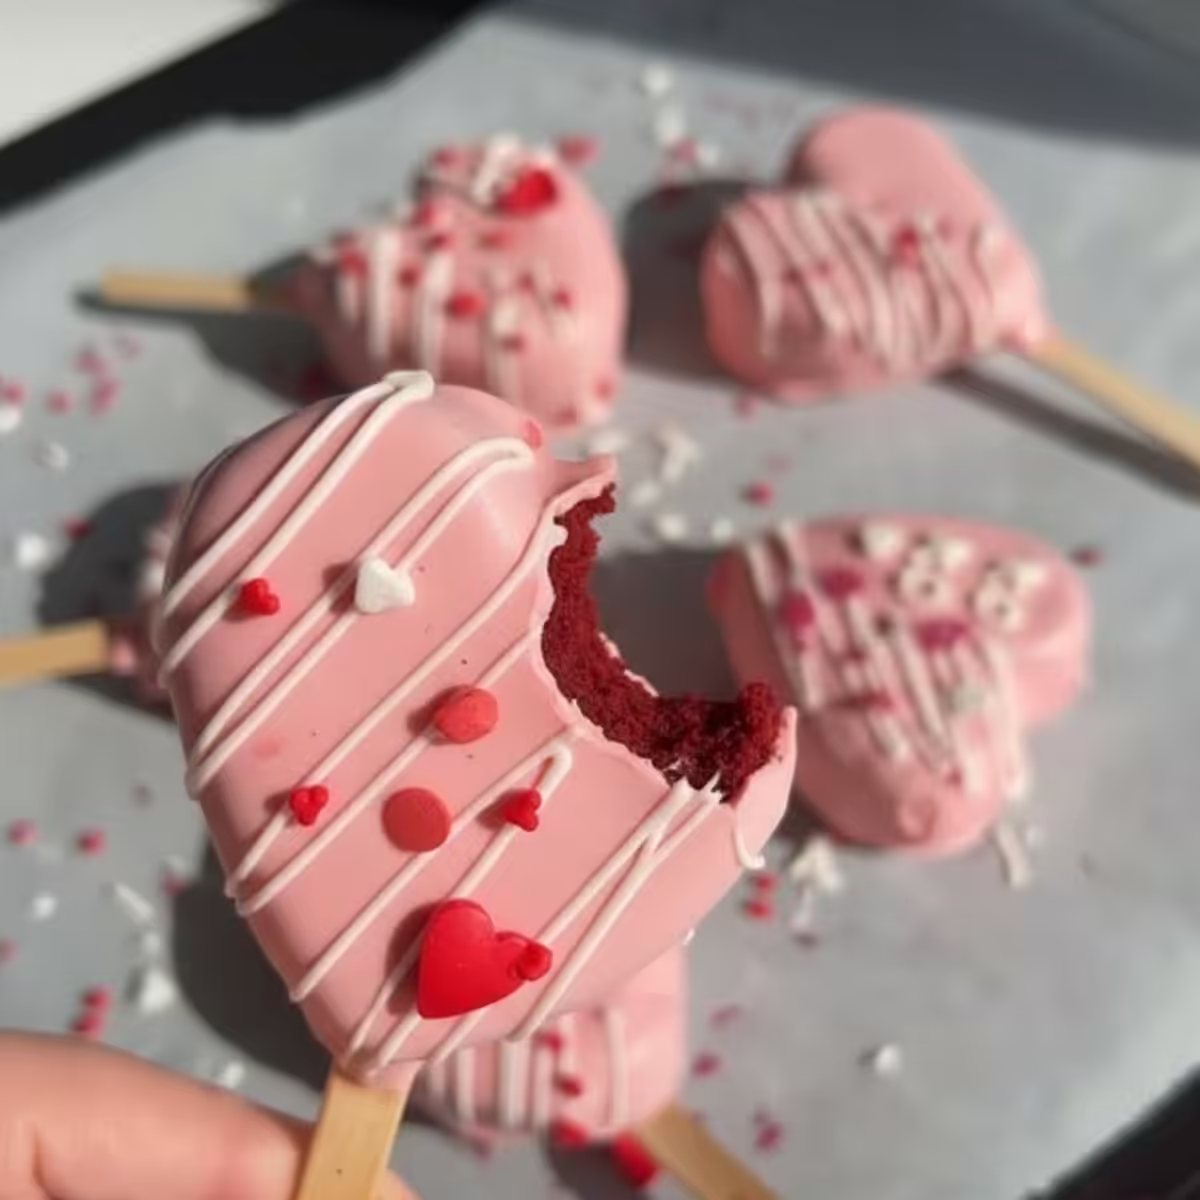

Heart-Shaped Red Velvet Cake Pops
Ingredients
Equipment
Method
- Crumble the cooled red velvet cake into a large bowl until it resembles fine crumbs with no large chunks remaining.
- Add the cream cheese frosting to the crumbs and mix thoroughly with a spatula or clean hands until a dough forms that can be rolled into a ball without cracking.
- Press the cake mixture into a 1-inch thick slab on parchment paper. Use a small heart-shaped cutter to punch out hearts, or shape them by hand. Place on a tray and freeze for 20 minutes.
- Melt a small amount of chocolate. Dip 1/2 inch of a lollipop stick into the chocolate and insert it into the bottom of a chilled cake heart. Repeat for all and chill for another 10 minutes to set the ‘glue’.
- Melt the remaining chocolate with coconut oil in a deep microwave-safe bowl. Dip each heart vertically into the chocolate until covered. Gently tap off the excess.
- Add sprinkles immediately while the chocolate is wet. Stand the pops upright in a cake pop stand or styrofoam block until fully set.